Billeder og vejledning til “Pro Splice” fra Brion Toss.
Pictures and tutorial for “Pro Splice” from Brion Toss.
Resumé – Øjesplejs instruktioner på dansk
Her viser jeg KUN “Pro Splice”. Tekst på billederne er engelsk.
Abstract – eyesplice tutorial in English
In this page I ONLY show the Pro Splice. Text in English in the Gallery.
Video: Professional Eye Splice Tutorial (Brion Toss Method).
You will find many You Tube tutorials for the “ordinary eyesplice”, Here is one: Eye splice 3. strand rope.
Pro Splice short explanation
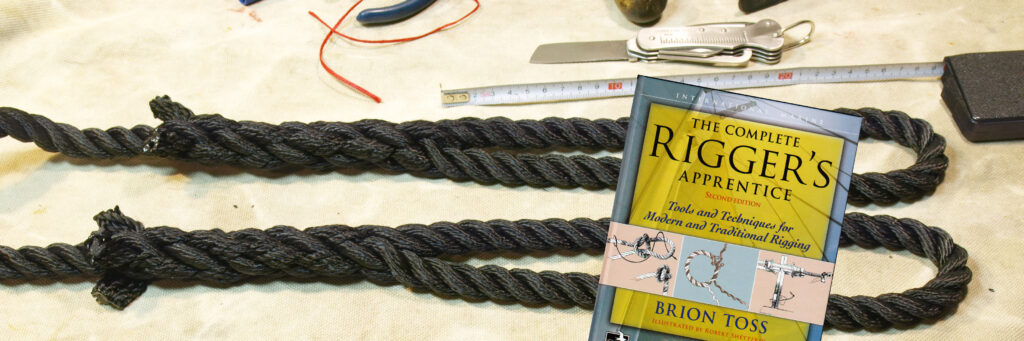
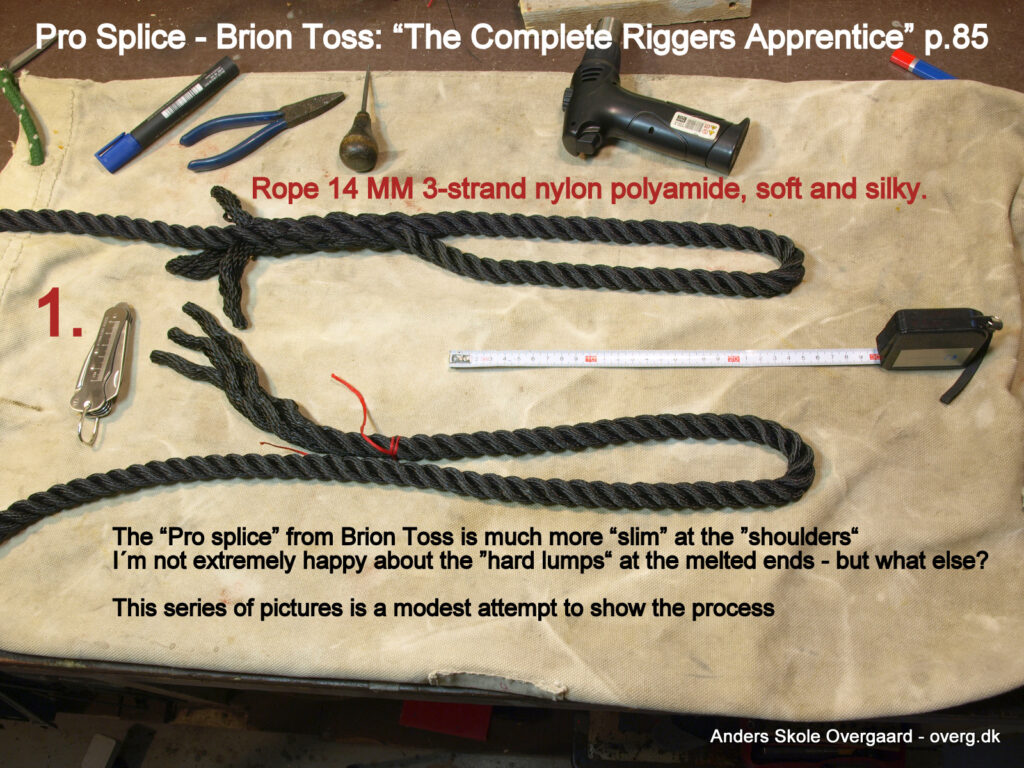
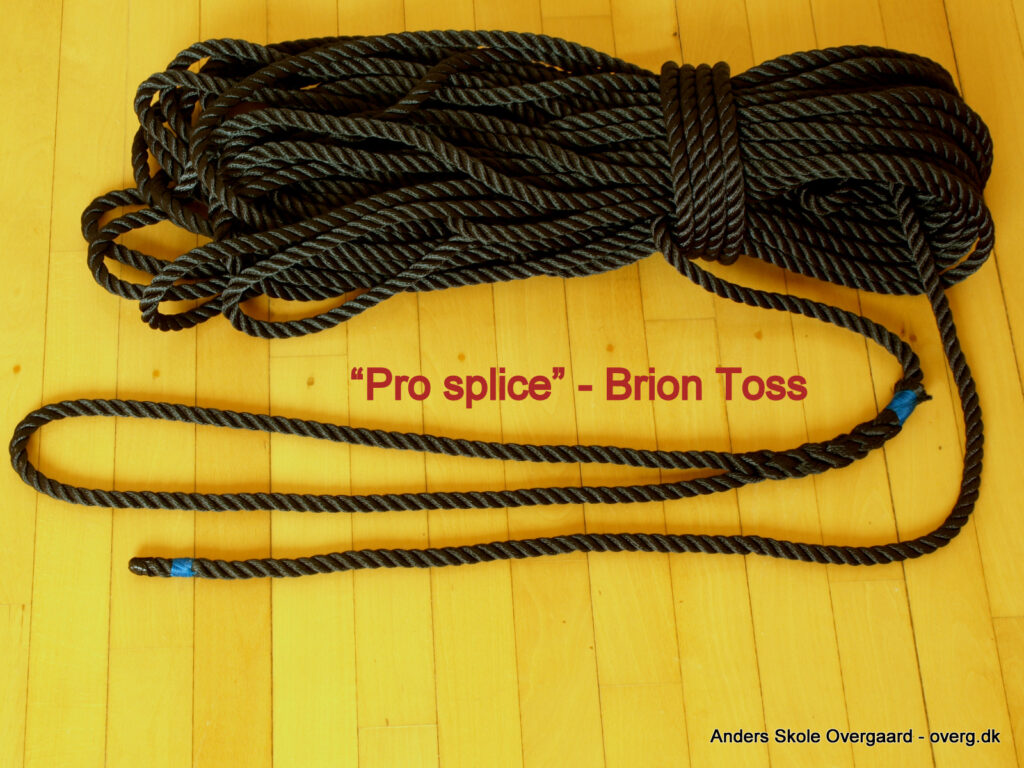
The gallery below, show pictures to demonstrate the “pro splice” page 85 “The Complete Riggers Apprentice” by Brion Toss.
This is a very good handbook!
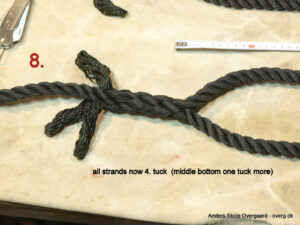
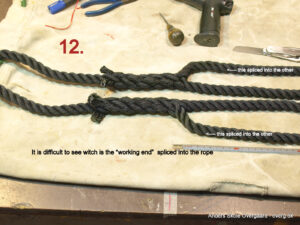
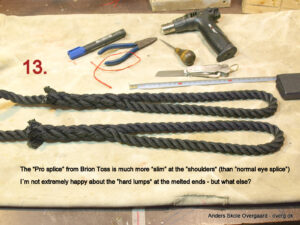
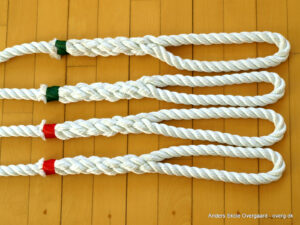
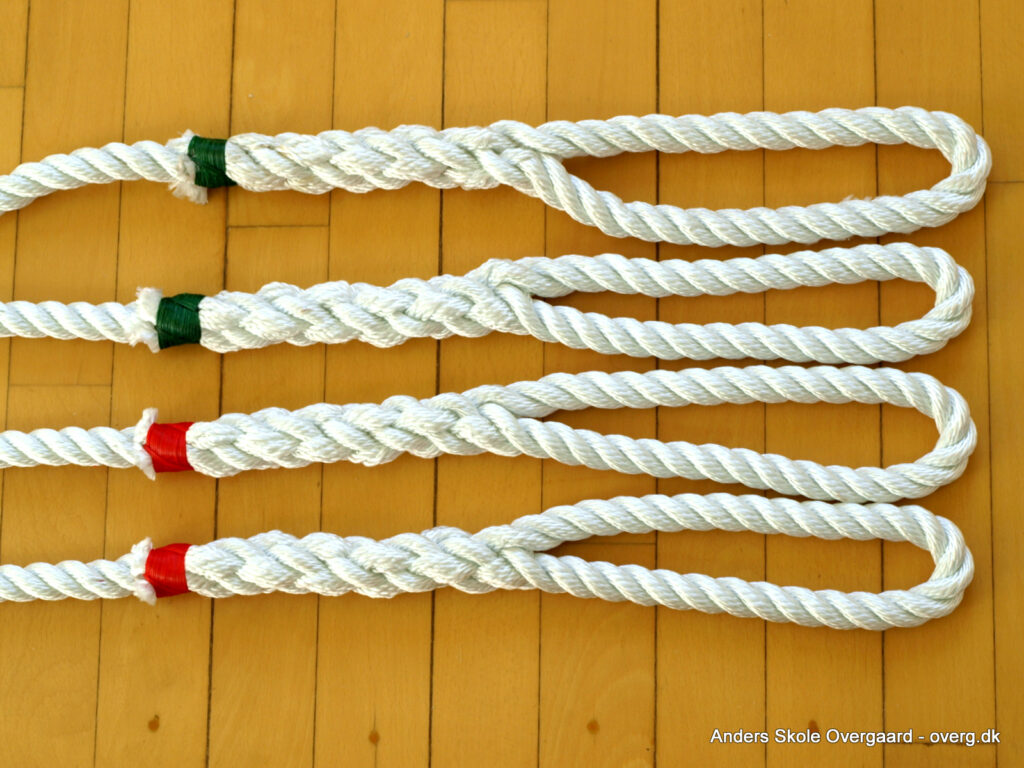
This Pro eye-splice is more narrow over “the shoulders” than the “normal eyesplice”, and I find this very elegant.
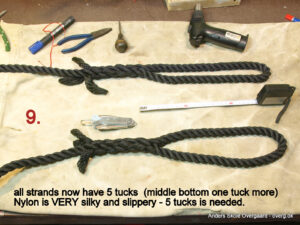
I DO NOT find “pro splice” suitable for a tigth splice on a thimble. The rope can NOT be tigth on the thimble.
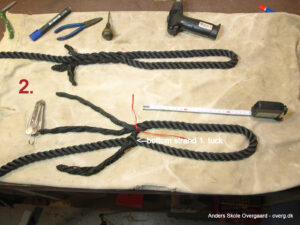
You could describe the method of the “pro splice” like this:
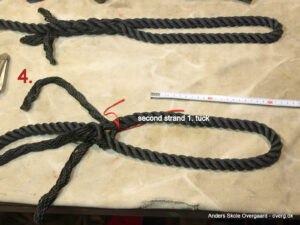
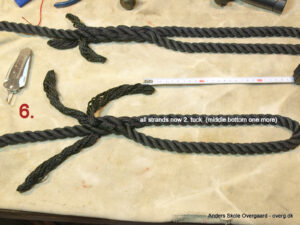
- Make 2 tucks with the “bottom strand” first.
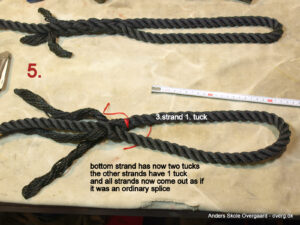
- Then tuck the last 2 strands “as usual”, so that ALL 3 STRANDS come out side by side.
- And you just continue the over/under “as usual”.
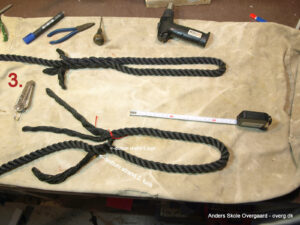
I take much care, that the 3 strands are pulled carefully and evenly in the first tucks. The splice will easily get a little distorted, if you don’t take care.
At the first 2 tucks, I keep the hard twist in the strands.
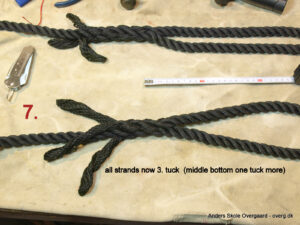
In the next 2-3 tucks, I let the strands become more and more loose, and the last tuck has NO twist in the strands. In that way the last tucks get more flat. This gives an elegant finish with a sailmakers whipping over last tuck.
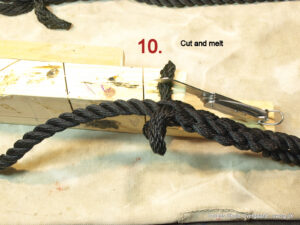
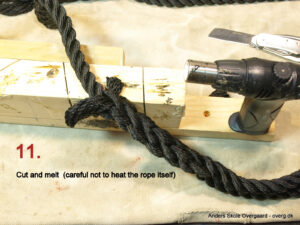
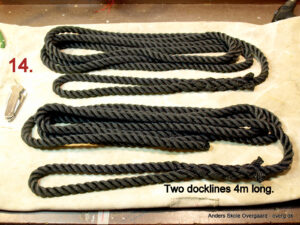
The pictures show the splice with melted strands – this is NOT so elegant, and you risk to damage the rope with heat.
I have now made it my standard method, to make a sailmakers whipping over the last tuck – this is much more elegant.
Slank Øjesplejs ”Pro Splice” kort forklaring
Galleriet herunder viser en serie billeder af, hvordan jeg har lavet den slanke “pro splice” af Brion Toss,
fra hans bog ”The Complete Riggers Apprentice” side 85.
OBS – Det er en særdeles god håndbog!
Denne ”pro splice” bliver mere slank over ”skuldrene” end normal øjesplejs, og det er mere elegant.
MEN – For ankertov som skal splejses stramt om en kovs, kan denne øjesplejsning IKKE ligge rigtig.
Man kan kort beskrive metoden sådan:
- Lav to indstik med den NEDERSTE kordel først.
- Lav derefter indstik med de to sidste kordeler, sådan at alle 3 nu kommer ud side om side. ”som sædvanligt”. Derefter fortsætter du bare med over/under.
Stram meget forsigtigt op stram meget ensartet på de 3 kordeler – ellers kan kordelerne i øjet blive uens stramme.
De første 2 indstik laver jeg med rimeligt stramt snoede kordeler. Derefter lader jeg kordelerne blive løsere og løsere, og sidste indstik med kordeler næsten uden snoling. Så kan man få en flot jævn afslutning med en syet takling der dækker sidste indstik.
Billederne er vist med smeltede tampe på kordelerne, det er lidt klumpet og man risikerer at skade tovet med varme.
Jeg er nu gået over til at jeg ”som standard” altid laver denne splejsning med en sejlmager takling / syet takling over sidte indstik – det er mest elagant.